Welcome to our Stampers Anonymous SU blog tour! Tonight we are delighted to show you projects using products that were available to us in our demo sneak peek from the 2010-2011 Idea Book & Catalogue.
You may have just come from
Melissa's blog, but if you are starting here, don’t worry … you can make the complete tour just by following the links at the end of each post. There are 14 stops along the way and we hope you will visit each one to see the wonderful creations we have to show you! Please feel free to leave some comment love along the way …
At the end of each post there will be a link to take you to the next stop on the tour.
So grab a cuppa, sit back and enjoy!
I would just like to say this is my first attempt at joining in a BLOG HOP,so I hope I did o.k and I had fun creating for you.
My first creation came from a new stamp set we were given to come up with an idea for the recent Stamp Camp for our team.
We did a shoe box swap and I was given the Look Who's Turning .....with young children in mind.You can find this set on pg 50 of our new catalogue and it was really fun card to make.
As you can see I stamped the animals then cut them out by hand.I did the same with the party hats and randomly placed them on the card as well as giving each animal a party hat. With this stamp set you have a row of numbers so you can be specific as to the age the child or grown up who is to be having a birthday. So as I have a son turning 5 next month I thought ahead. You can't see it, but I used plastic sheeting over the number and punched it out with a 1" punch circle. I also used Versa Mark for the background.
Supplies used:
Stamp Set:Look Who's Turning
Cardstock:Pumpkin Pie, Old Olive, Real Red and Whisper White
Ink:Real Red, Pumpkin Pie, Tempting Turquoise, So Saffron and Old Olive
Other:Oval Punch, Scallop Oval Punch,1" Punch, Plastic Sheeting Dimensionals & Versa Mark
Next up is something new for me in more ways then one.
Along time ago I purchased a template from
Becky Roberts which is called a Valentines Box. I never had a chance to use it until now and because I wanted to use the lovely DSP Greenhose Gala for this I thought I would have a go. What do you think?
To add to the box I also used the new co-ordinating stamp set called Friends Never Fade which you can find on pg 71 of the new catalogue. On the front of my box I made 2 paper flowers which were so easy.
For each flower you just punch out 5 scalloped circles. Pierce a hole through each, then dampen them with water and scrunch them.Once they are dry put through a brad and unfold them to the desired shape. With alittle bit of 2 way glue stick I just went around the edges and dunked them into dazzling diamonds.
The tag was a stamped image from the Friends Never Fade in Baja Breeze and placed onto a Chocolate Chip punched scalloped circle. I then tied on a button and that was tied to the Real Red Grosgrain ribbon.
Now for the inside.
The contents of inside are 4 cards which are 4x4" in size all with the Greenhouse Gala DSP.
A sweetie or mouth mint box.
A miniture chocolate box.
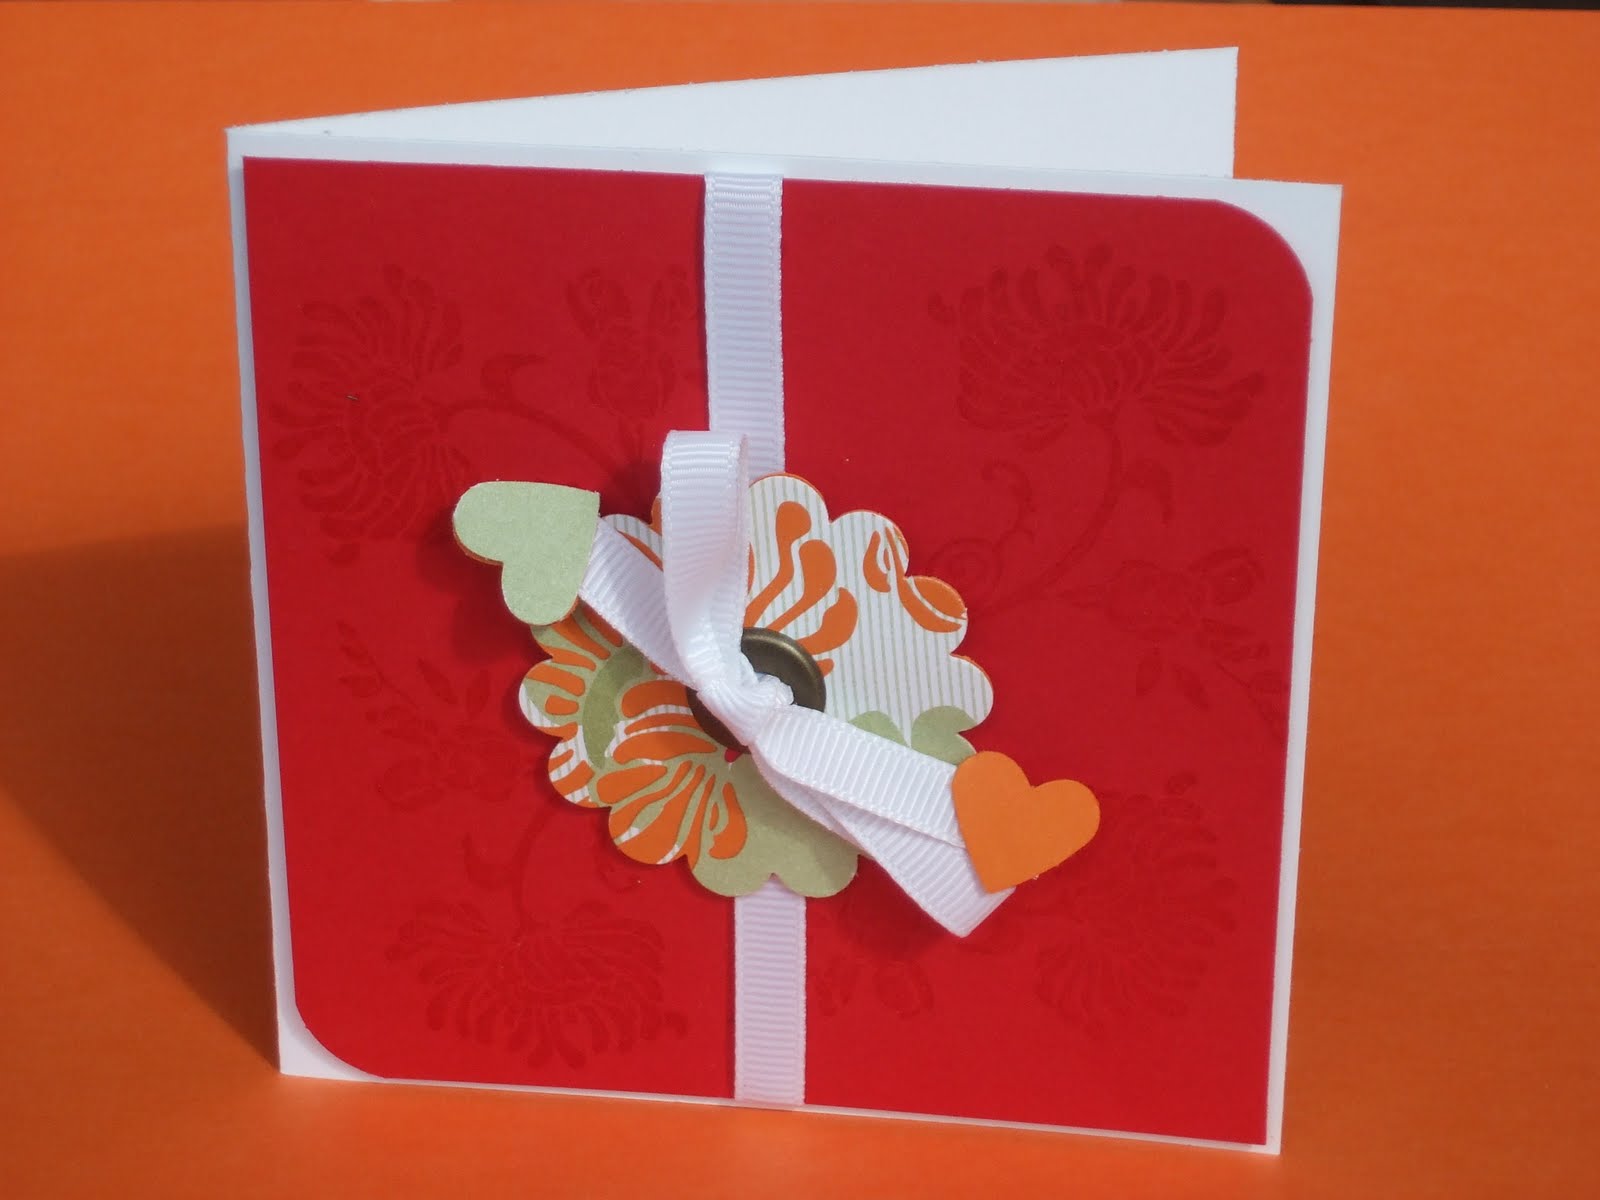
1. Front left.
Corner punch was used on the Real Red cardstock. Not that you can see so well, but Versa Mark on the backgound.Brass eyelet place in the centre of the scalloped circle and I tied a bow in the middle and stuck on punched out hearts.
Supplies Used:
Stamp Set:Friends Never Fade
Cardstock: Real Red, Pumpkin Pie & Whisper White
DSP: Greenhouse Gala
Other: 1/4" Whisper White Grosgrain Ribbon,Brass Eyelet, Heart Small Punch & Dimensionals
2. Back left.
First of all this wasn't easy for me to make a weave card, but I am happy with the end results.
The strips I cut 8 into 1" x 3 3/8th" and stuck down the edges with Sticky Strip to stop it from lifting.
I punched out an oval circle which I then folded over onto the edge of the card with piercing a Build A Brad through it with the matching DSP. I have stamped a butterfly from the Stamp set Great Friends pg 84.
I copied the image onto the plastic sheeting and let it dry. Cut this by hand and placed alittle bit of snail to keep them together.
I did the same effect to the tag hanging off the butterfly and thread through twine.
Supplies Used:
Stamp Sets: Great Friends
Cardstock: Baja Breeze & Whisper White
Ink: Baja Breeze
DSP: Greenhouse Gala
Other: Build a Brad, Plastic Sheet, Twine and Crop-a-dile
3. Back right.
This one I think is my most favorite.
The colours are very vibrant with Pumpkin Pie and Daffodil Delight. I added Chocolate Chip Taffata Ribbon and ink and Versa Mark on the background.
On the inside I stamped the flower in Pumpkin Pie and cut this out and stamped it again in chocolate chip and cut out the centre and stuck it on with a dimensional.
Supplies Used:
Stamp Set: Friends Never Fade and Great Friends
Cardstock:Whisper White and Pumpkin Pie
DSP:Greenhouse Gala
Ink:Chocolate Chip and Pumpkin Pie
Other:Choc Chip Taffata Ribbon, crop-a-dile & dimensional
4. Front right.
Again sticking to the Greenhouse Gala DSP I went for a simple look and cut a 2.5"x2.5" square piece of DSP to be placed high on the card and matted it onto Baja Breeze card stock. Punched a hole for the ribbon and introduced a saying from Cheep Talk whicj I'm happy to say is staying in the new catalogue.
Supplies Used:
Stamp Sets:Cheep Talk & Friends Never Fade
Cardstock: Baja Breeze & Whisper White
DSP:Greenhouse Gala
Ink:Chocolate Chip & Baja Breeze
Other:Chocolate Chip Taffata Ribbon, Crop-a-dile
To finish off my samples I have one more card for you and to match the box I made.
With this card I again stamped the image twice in two different colours and cut the flower to place it over the orginal. I cheated with the bow. You fold two loops and tie them with the twine. Get a button and tie the twine through it and tie. I then put a dimensional at the back to secure it on.
Supplies Used:
Stamp Set: Friends Never Fade
Cardstock: Real Red, Baja Breeze, Chocolate Chip, Crumb Cake and Whisper White
DSP:Greenhouse Gala
Ink: Real Red & Chocolate Chip
Other: Real Red Button, Choc Chip Ribbon, Twine, Dimensional & scalloped edge punch.
Now that's enough from me and you’re off to enjoy the wonderful creations of
Nikki Stalker.Thanks for stopping by!
If you happen to lose your way here’s a list of all participants.
1. Fiona Harvey
http://fionastamps.blogspot.com/
2. Juliette Chapman
http://juleskraftikrafts.blogspot.com/
3. Kerry Bunting
http://www.kbpapercraft.blogspot.com/
4. Kirrily Matthews
http://kirrilymatthews.blogspot.com/
5. Lorna Casha
http://www.lornacasha.blogspot.com/
6. Marelle Taylor
http://www.marelletaylor.com/
7. Meighan Wheller
http://meighanwheller.blogspot.com/
8. Melissa Gillis
http://www.stampinup.net/esuite/home/wishflowerstudios/blog
9. Nikki Stalker
http://www.nicolestalker.com.au/blog
10. Sally Williams
http://www.sallycancraft.com/
11. Sam Coppack
http://samcoppack.blogspot.com/
12. Sandy Quail
http://www.scrappyhabits.com/
14. Sharon Wilson
http://shaz.argyle.com.au/blog/index.php